
- Adam Liberadzki
- Read in 3 min.
Chrome DevTools is a front-end developer’s toolkit. Among other things, it’s mainly used for debugging, optimizing and editing web pages.
- To enable the console view in the Chrome browser, press the F12 key.
- To enable the panel so you can find tabs/functions or move between tabs, press
Ctrl + Shift + pat the same time (analogous panel as in Visual Studio Code or IntelliJ). Protip! Instead of typing the entire phrase consisting of a few words you can type the first letters of the words.

This tab allows us to simulate the behavior of our application while using different media. There is a choice of several most popular models of smartphones and tablets (in both planes), you can also enter your own limit values in pixels. Keep in mind that different browsers run on different engines and this can also affect the performance. In case of Apple devices, the safest way is to test directly on macOS and iOS.
Here we can do quite a few things.
First of all, we can see the DOM tree structure that has been rendered. We have access to edit each element – we can move, copy, delete them. We can add, change and remove classes and styles. Everything happens locally. When you refresh the page the settings reset.
Manual text modification (from Codrops website):
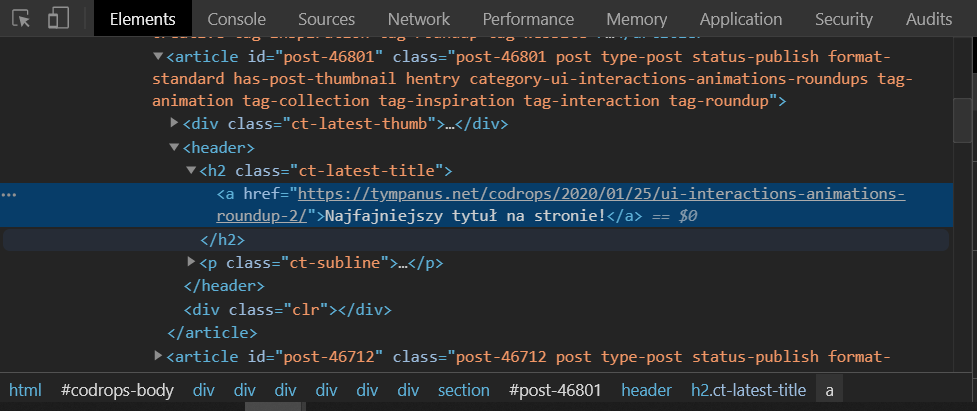
Highlighted selected element with changed name (padding shown in green):

Below you can see a tab for toggling the pseudo-classes of the selected element. This allows us to simulate the behavior of elements e.g. after hovering the cursor.

Tab to toggle selected element’s classes (especially useful when we use libraries with ready-made UI components):

The cool thing is that existing classes are prompted while typing.
The place where we use JavaScript is where we can type functions (thanks to shift + enter even multi-line functions), we can refer to elements that were previously selected with the cursor ($0 for last selected, $1 for last but one, etc).
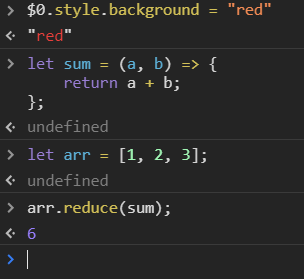
When debugging JS code, the good old console.log() is often used. There is a couple of replacements for simple logging that can make life even easier:
console.error():

console.warn():

console.table() – ideal for logging JSON data:

console.group('Przepis') and console.groupEnd('Przepis') (+ located inside 3xconsole.warn()):

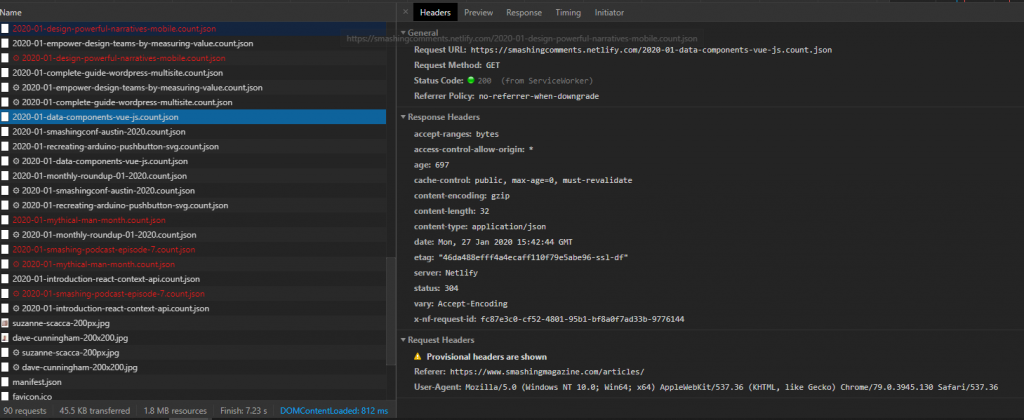
This is one of the most important tabs when working as a front-end developer. When it is active, it allows us to keep track of all queries. They are “saved” and presented on a timeline and on a list.
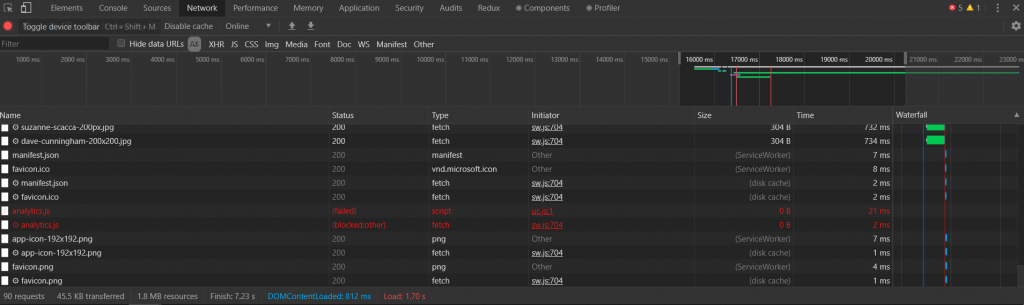
The image above shows a lot of information. First of all, we have marked the period on the axis we are interested in, as soon as this page loads. Below, the list has been truncated for only those queries, that took place during that time. For each query, the most important information is presented.
After selecting one query its details are shown. Here you can see the Headers tab, which presents the details of the requested query:
This is a tab with the received response, in case of data mostly in JSON format.

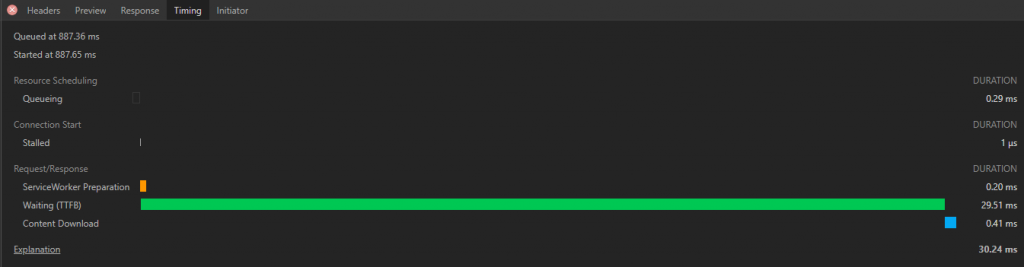
This is where we see timing, which shows exactly how the time was spent.
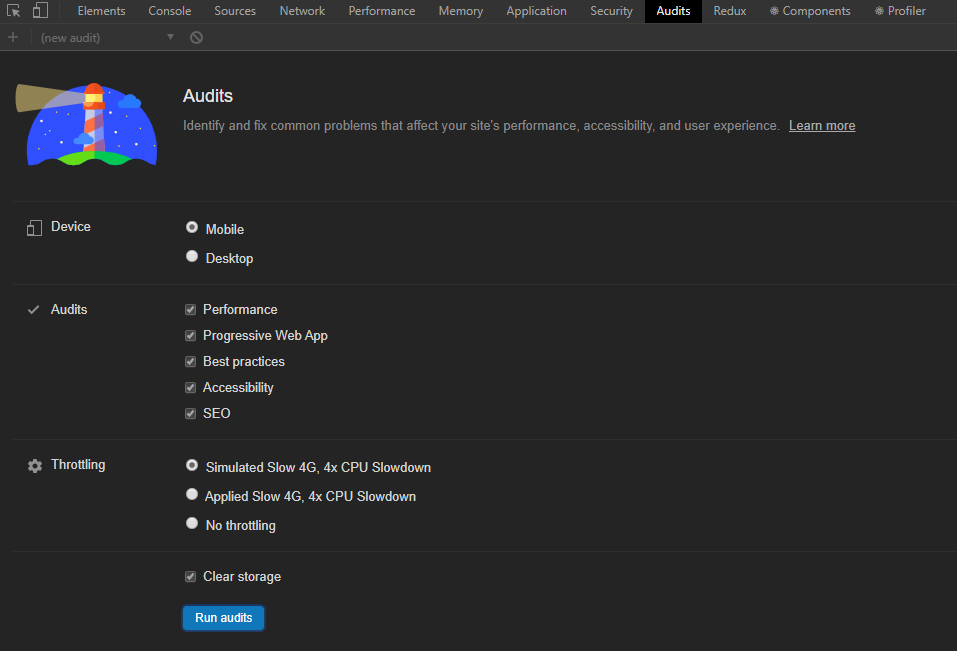
To check the quality of our website we have Audit tab. Below there are the options for which we will run an audit, that is, simulate the operation of a smartphone with four times slower CPU and slower Internet.
For Smashing Magazine, after a while we got the following results:
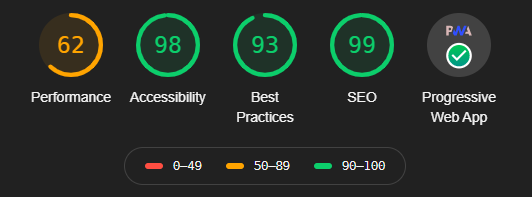
As you can see, they embrace these topics well. Performance seemed to be poor quality and as by wanting to improve it, the following messages should have been taken into account, telling us directly what to improve and how it the possible outcome.
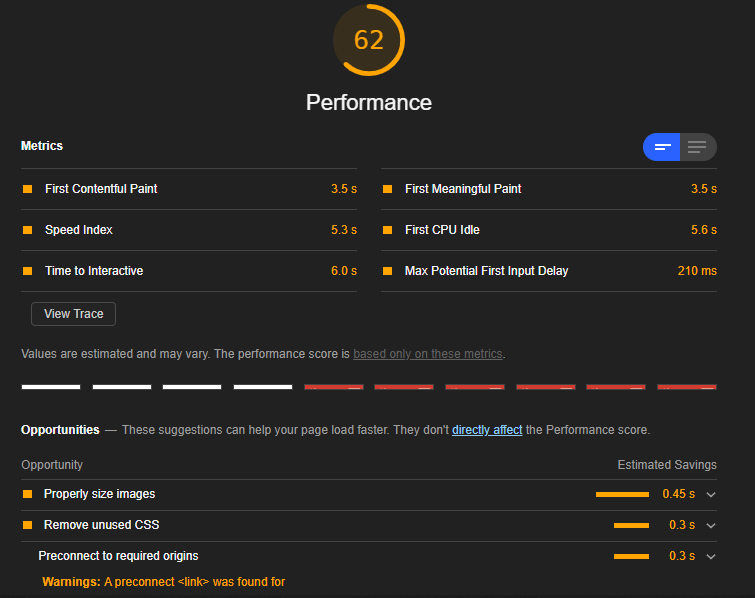
Remember that we can do audit infinitely many times. It is best to make small changes and each time turn the audit on and analyze the results.
The most important information here is the data from storage and cookies.
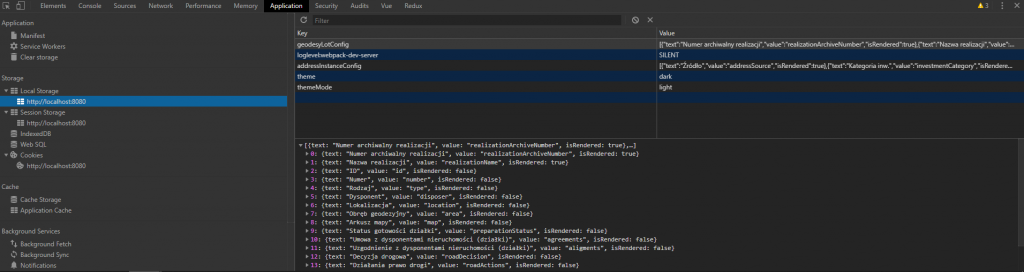
Storing information in local storage:localStorage.setItem("key under which you want to save the data", data);
<code>localStorage.setItem("key under which you want to save the data", data);</code>Reading information from local storage:localStorage.getItem("key under which data was saved");
Deleting information from local storage:localStorage.clear("the key under which the data was saved");
Storing cookies:document.cookie = "food=love cookies";
Summary
Above we discussed only the most basic features of Chrome DevTools. It is a tool, thanks to which, we can easily work on code quality from the browser level. The tool is being constantly developed, so it’s definitely worth checking what new features we can expect in the next versions.
Check out other articles in the technology bites category
Discover tips on how to make better use of technology in projects