- Marek Dudziński
- Read in 4 min.
What is Behaviour-Driven Development?
Behaviour-Driven Development (BDD) is a process which relies on conversation and analysis between the business and developers. This process leads to divide the project into features/behaviors that should be implemented and tested at once. This pattern has become popular mainly because of its simplicity on the business side – documentation and test scenarios are written in common language, not programming one.
Cucumber and Gherkin
The most popular tool for working with BDD is Cucumber. Cucumber is a testing framework that allows to create specific test cases. Each scenario is capable of testing a simple feature or even an end-to-end test case. The process starts with an analysis of how the functionality is supposed to work. Instead of sustaining it in a strictly businesslike manner, the documentation is created inside the test using the Gherking language. Of course it is still recommended to maintain documentation on its own, but this tool helps the development side understand the customer’s needs.
Configuration
Foremost, it is required to add maven dependency to project. There following dependencies make Cucumber work with Spring and JUnit.
<dependency>
<groupId>io.cucumber</groupId>
<artifactId>cucumber-java</artifactId>
<version>6.11.0</version>
<scope>test</scope>
</dependency>
<dependency>
<groupId>io.cucumber</groupId>
<artifactId>cucumber-junit</artifactId>
<version>6.11.0</version>
<scope>test</scope>
</dependency>
<dependency>
<groupId>io.cucumber</groupId>
<artifactId>cucumber-spring</artifactId>
<version>6.11.0</version>
<scope>test</scope>
</dependency>
Please note that JUnit older than version 5.0 possibly won’t work with Cucumber. To fix this, add to pom.xml following:
<dependency>
<groupId>org.junit.vintage</groupId>
<artifactId>junit-vintage-engine</artifactId>
<version>5.7.2</version>
<scope>test</scope>
</dependency>
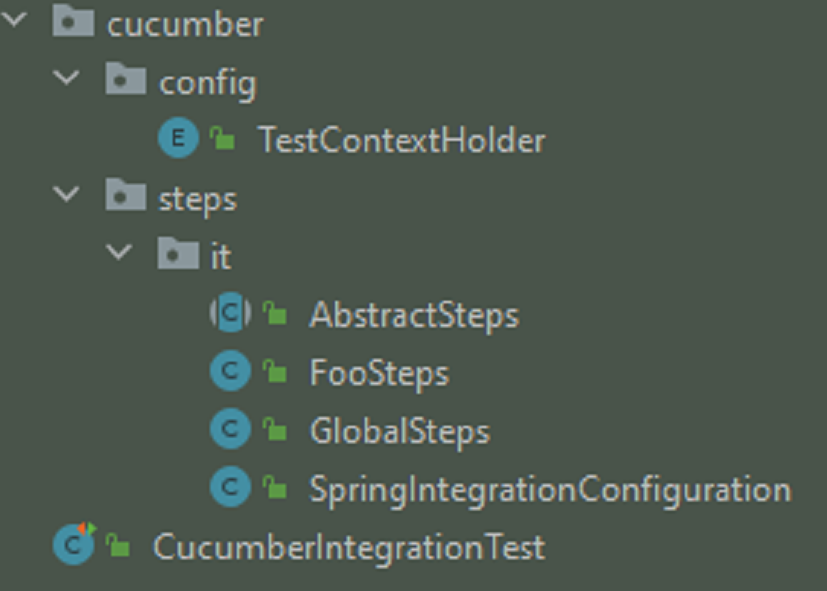
The most important class inside Test directory is Runner class. In this class, user has to declare directory of features files (scenarios) and glue files (implementation of scenario steps).
@RunWith(Cucumber.class)
@CucumberOptions(
plugin = { "pretty", "json:target/cucumber-reports/cucumber.json"},
features = "src/test/resources/features",
glue = {"foo.cucumber.steps.it",
"foo.cucumber.config"})
public class CucumberIntegrationTest {
}
Runner class has to be in root directory of any other cucumber class and name of the file must end with „Test”.

Runner class is the configuration file of the Cucumber. Now we need to pair it with Spring context by creating a second configuration file.
@Slf4j
@CucumberContextConfiguration
@ActiveProfiles(profiles = &quot;test&quot;)
@SpringBootTest(webEnvironment = SpringBootTest.WebEnvironment.RANDOM_PORT)
public class SpringIntegrationConfiguration {
@Before
public void setUp() {
log.info(&quot;----------- TEST CONTEXT SETUP -----------&quot;);
}
}Example use of Cucumber
For better understanding take a look at following Cucumber scenario:
Scenario Template: User calls for subscribed product's prices
When User prepares and executes GET request for <productName>
Then HTTP Status is successful
And Every record of the response has the same productName: <productName>
And Every record of the response has the <shopType>
Examples:
| productName | shopType |
| "Apple iPhone 12 128GB Purple 5G" | XKOM |
| "Samsung Galaxy S20 FE Fan Edition Snapdragon White" | XKOM |
| "Smartfon APPLE iPhone 12 Pro 128GB Grafitowy MGMK3PM/A" | MEDIA_MARKT |
| "Gonso Sitivo Thermo Bib Tights with Firm Seat Pad Men, czerwony (2021)" | BIKESTER |
The scenario file represents the flow of a specific application. Each step of the flow is represented by user-friendly sentences. This is the Gherking language! It allows the business side of the project to be part of the implementation of the application functionality. It is possible to write parameterized scenarios using datasets, which is a very similar mechanism to other testing frameworks. (Please note that for simplicity, the classic Given step has been merged with When. In many cases it is recommended to use the ,,Given, When, Then” division).
Each step of the flow is implemented using Java or other tools, such as Rest Assured or JUnit. In order to pass data through steps while testing Rest API in the same context, it is required to implement context container:
public enum TestContextHolder {
CONTEXT;
private static final String PAYLOAD = &quot;PAYLOAD&quot;;
private static final String REQUEST = &quot;REQUEST&quot;;
private static final String RESPONSE = &quot;RESPONSE&quot;;
private final ThreadLocal&lt;Map&lt;String, Object&gt;&gt; testContexts =
withInitial(HashMap::new);
public &lt;T&gt; T get(String name) {
return (T) testContexts.get()
.get(name);
}
public &lt;T&gt; T set(String name, T object) {
testContexts.get()
.put(name, object);
return object;
}
public RequestSpecification getRequest() {
if (null == get(REQUEST)) {
set(REQUEST, given().log()
.all());
}
return get(REQUEST);
}
public Response getResponse() {
return get(RESPONSE);
}
public Response setResponse(Response response) {
return set(RESPONSE, response);
}
public Object getPayload() {
return get(PAYLOAD);
}
public &lt;T&gt; T getPayload(Class&lt;T&gt; clazz) {
return clazz.cast(get(PAYLOAD));
}
public &lt;T&gt; void setPayload(T object) {
set(PAYLOAD, object);
}
}This class ensured that all the flow triggered by the request would be covered by the same context. The first thing to do is to make a request with a parameterized body:
//GET STEPS
@When(&quot;User prepares and executes GET request for {string}&quot;)
public void userPreparesAndExecutesGETRequestAsBelow(String productName) {
final String executionUrl = baseUrl() + SCRAP_ENDPOINT;
final Response response = given()
.contentType(ContentType.JSON)
.param(&quot;productName&quot;, productName)
.log()
.all()
.when()
.get(executionUrl);
testContextHolder().setResponse(response);
}Note that testContedHolder is created outside the scenario step. It is only modified at the end of the step. By that, it is possible to create next step with assertions:
@Then("HTTP Status is successful")
public void httpStatusIs200() {
final Response response = testContextHolder().getResponse();
Assert.assertEquals(HttpStatus.OK.value(), response.getStatusCode());
}
@And("Records of the response has the same productName: {string}")
public void everyRecordOrTheResponseHasTheSameProductName(String productName) {
final Response response = testContextHolder().getResponse();
response.then().assertThat().body("responseProductList", notNullValue())
.body("responseProductList[0].productName", equalTo(productName))
.and()
.body("responseProductList[1].productName", equalTo(productName));
}
Summary
In this article, I covered the basics of using and configuring Cucumber. The first encounter with this tool can be difficult, as it required strict configuration, but after that it should make the test development process much easier. Implementing this tool into your project should improve communication between your team and reduce the time spent on bug fixing application.
Check out other articles in the technology bites category
Discover tips on how to make better use of technology in projects


