- Kamil Łoń
- Read in 2 min.
In the last article here, I showed you a few useful plays in Visual Studio to boost your coding. From experience, I know how much time developers can spend on writing tests. Equally, time-consuming can be debugging apps. This time I’d like to show you some tricks, so that testing and debugging will be a little bit easier and faster.
1. Snippets
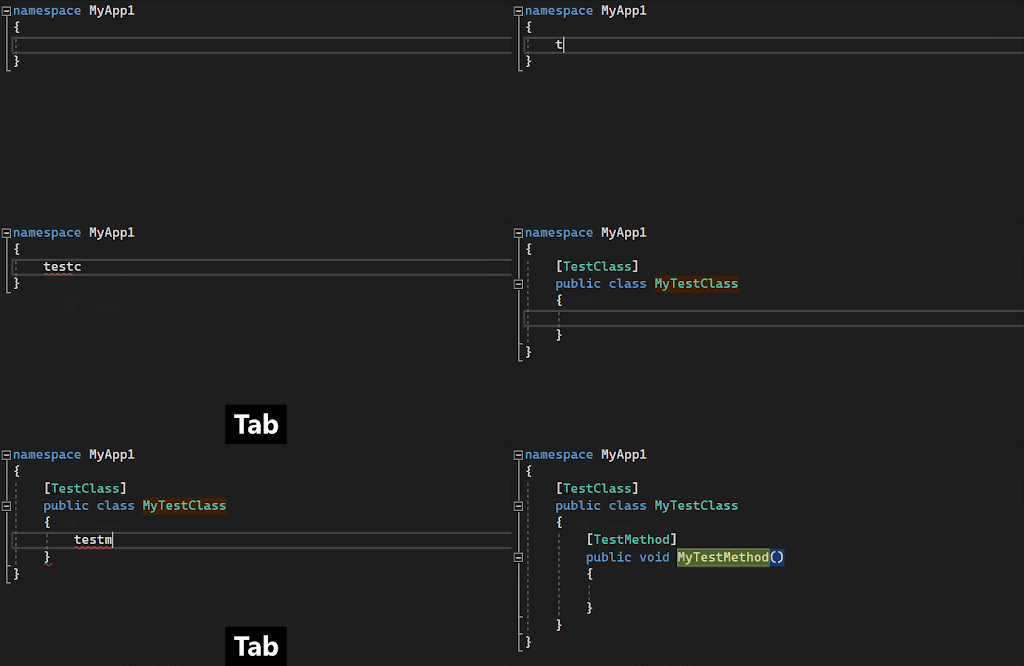
While starting coding we define classes, the same with testing – we need to write some boilerplate. But thanks to Visual Studio there are snippets. Let’s use testc and testm snippets to write test classes and methods.
Remember to double-tap Tab button to activate the snippet!
2. Run tests using keyboard shortcut
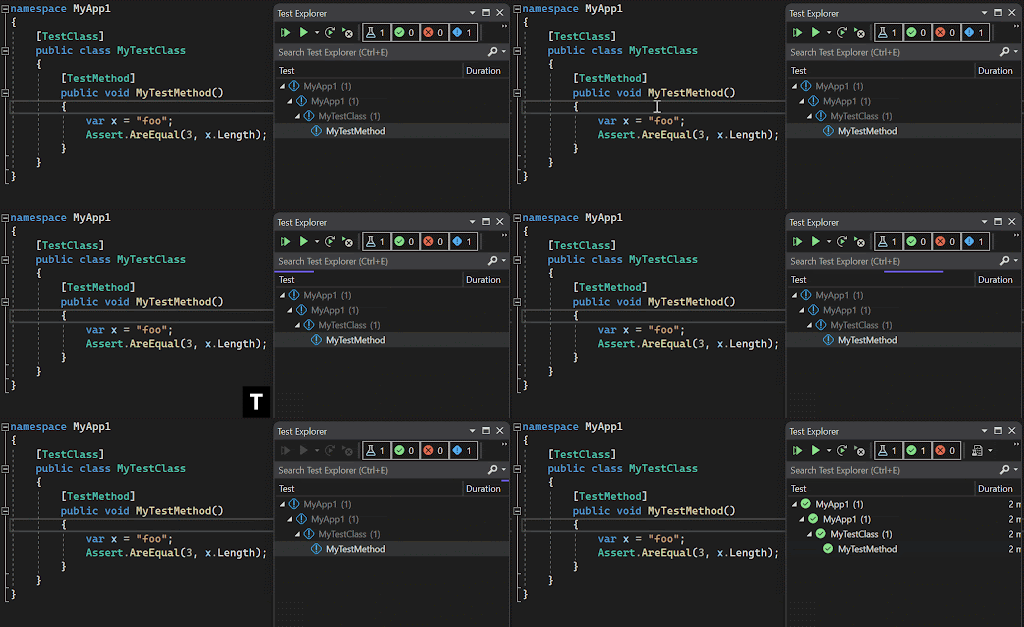
There is a possibility to run a just written test without taking your hand off the keyboard. Just set the caret in the scope you want to run. If you want to run only one test, set caret in this test. If you want to do it for all tests from test class, set caret between test methods. After that, use Ctrl+R, T shortcut and just look at the result.
3. Test debugging
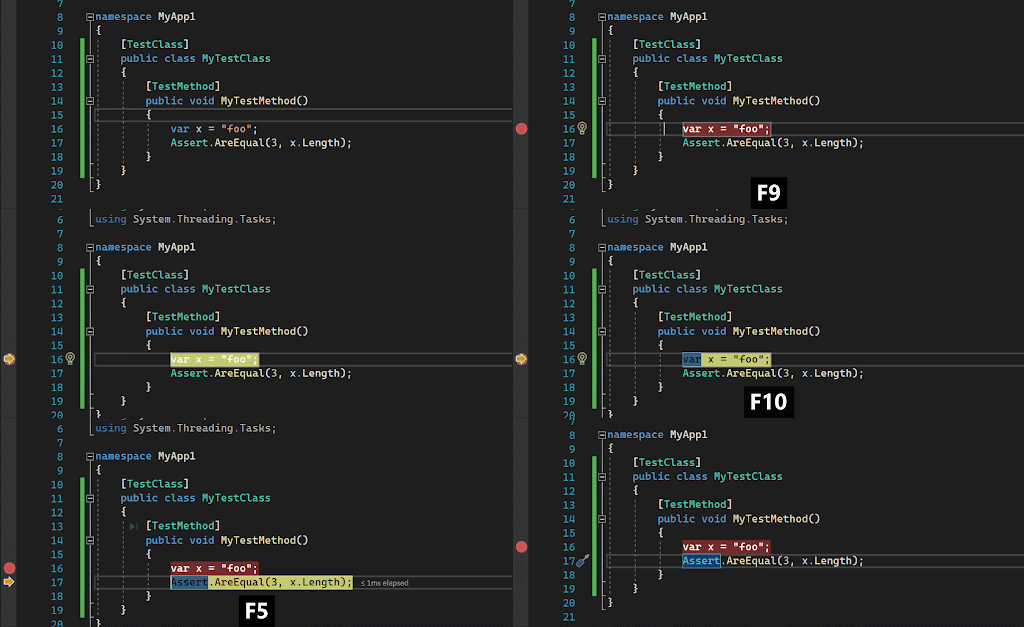
Run tests, tests passed, everyone happy – but it’s not always a reality. Often code does not work as expected, so we need to start debugging. First let’s make a breakpoint, use F9 to do it. Now use Ctrl+R, Ctrl+T shortcut to start debugging selected test. To move to the next line while debugging, use F10 key, and F5 to continue execution. Look at the example.
4. Attaching to process
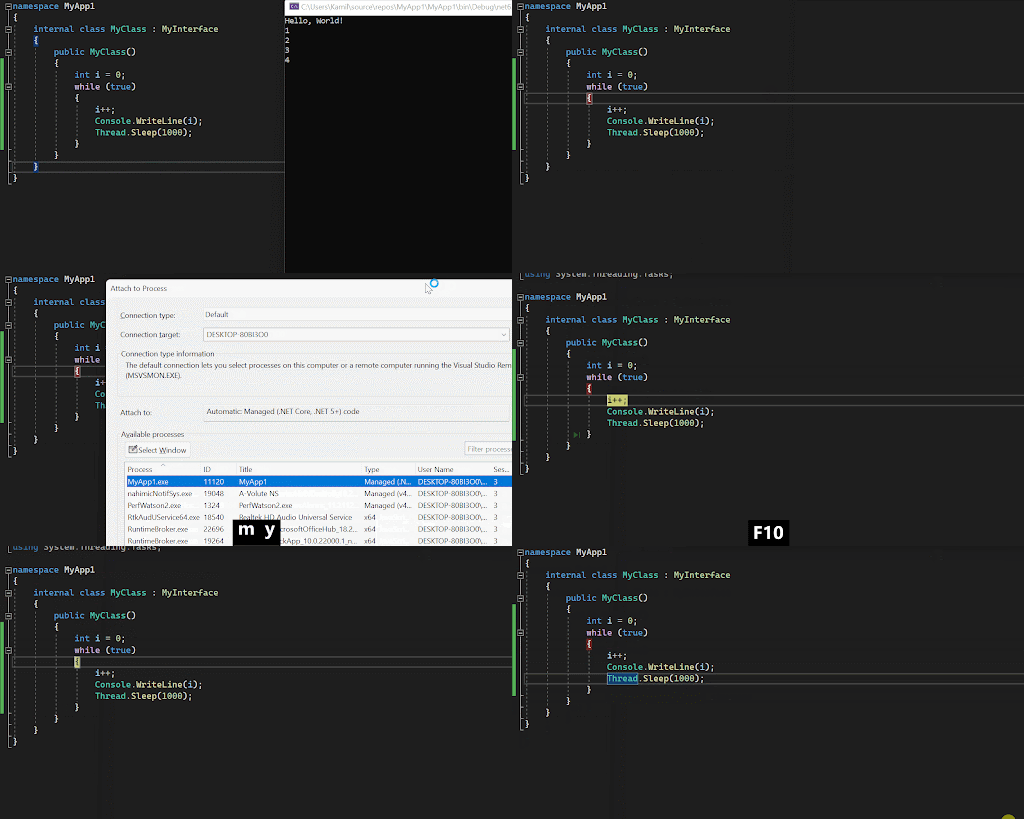
When debugging, it is good to know some very useful features in Visual Studio, one of them is Attaching to process. It’s useful when you want to start debugging without restarting the whole app. To attach a debugger, you can use a special “Attach to process” window. Let’s use the Ctrl+Alt+P keyboard shortcut to show the window, and find your process just by starting typing, and then press Enter. Now the debugger is attached to your app. To detach debugger, use Shift+F5. Look below how it works.
Tip: To reattach to the last process, use Alt+Shift+P shortcut.
Bonus: Conditional breakpoints
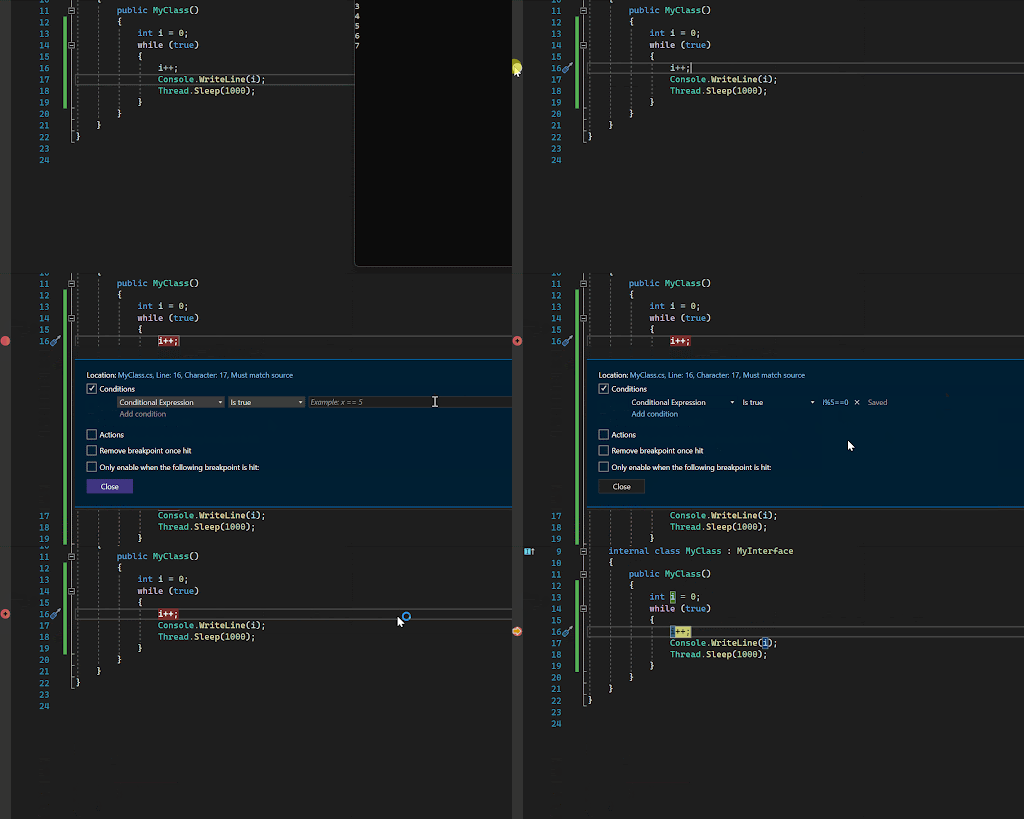
At the end, I have one more debugging tip for you. When you want to add some logic to breakpoints, use conditional breakpoints. Just click options near breakpoint and write some conditions to manage breakpoint when to be stopped. Look at the example.
Summary
I hope you’ll use some of the presented tricks at least once and feel better when testing and debugging your app. I recommend using as many keyboard shortcuts as possible to improve your work.
Check out other articles in the technology bites category
Discover tips on how to make better use of technology in projects


